Take the first step towards streamlining your email management with MailAgent.ai. From the comfort of our homepage, one click on "Create my free email agent" sets you on a path to a smarter inbox. Or use the link Create Agent. This action commences the integration of your customer service email with our sophisticated AI-driven platform.
Upon establishing this connection, you will unlock the capability to generate precise, personalized email drafts, thus enhancing the efficacy and professionalism of your client interactions. Follow the steps below to integrate your customer service email and set the stage for unparalleled communication management.

At MailAgent.ai, we believe managing your emails should be as straightforward and stress-free as running your business. Our intelligent platform, designed to simplify your inbox and enhance communication, is here to reclaim the hours lost to email management.
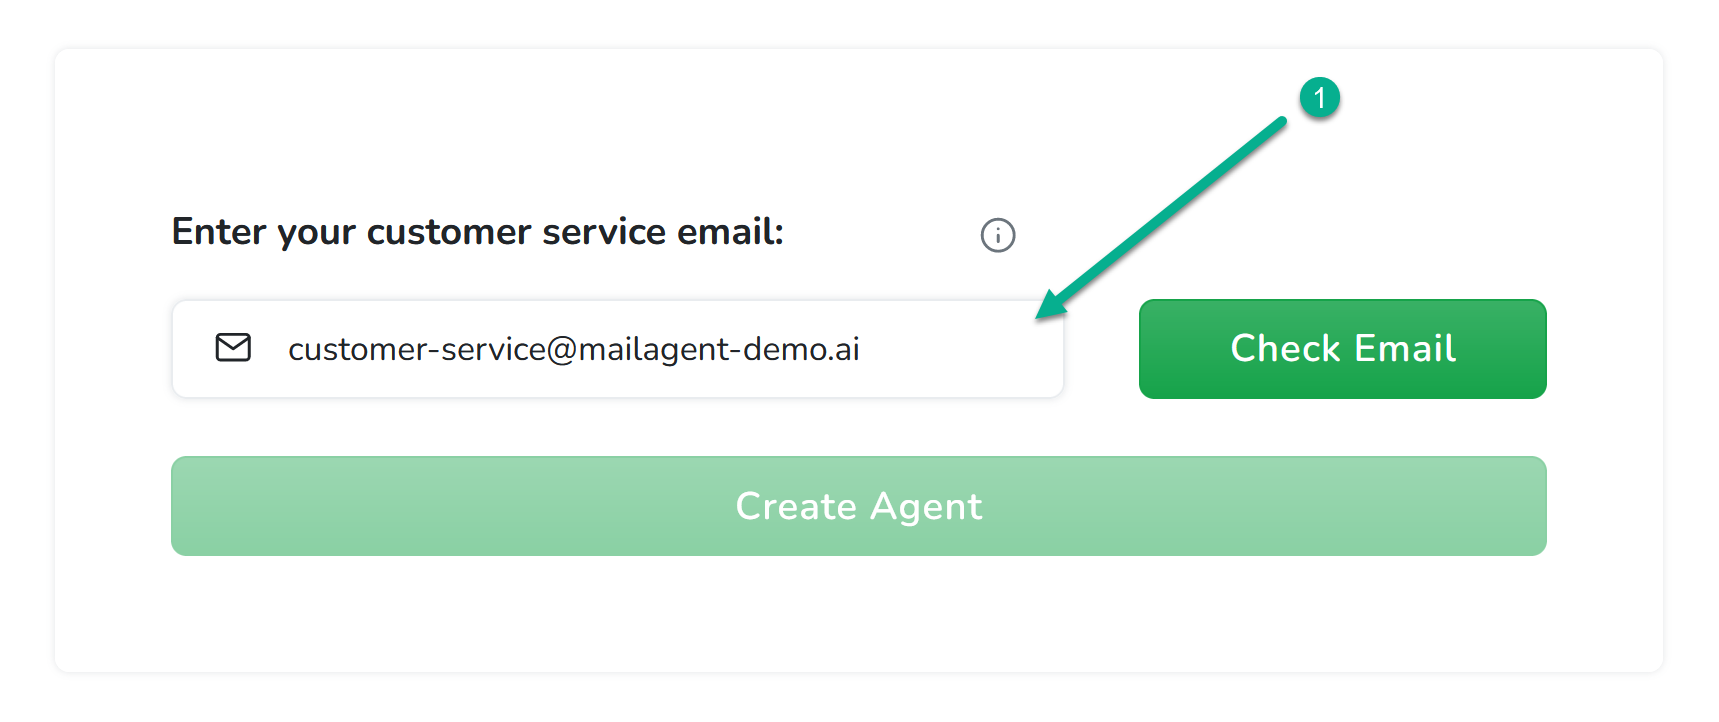
Start by entering the customer service email you wish to integrate with MailAgent.ai. This should be the primary email you use for customer interactions.
Click on 'Check Email' to allow MailAgent.ai to verify the provided email address. This is to ensure that the email is active and that you have access to it.
Upon clicking 'Check Email', our system will automatically try to detect your email provider's details. This step is crucial for setting up the connection appropriately.
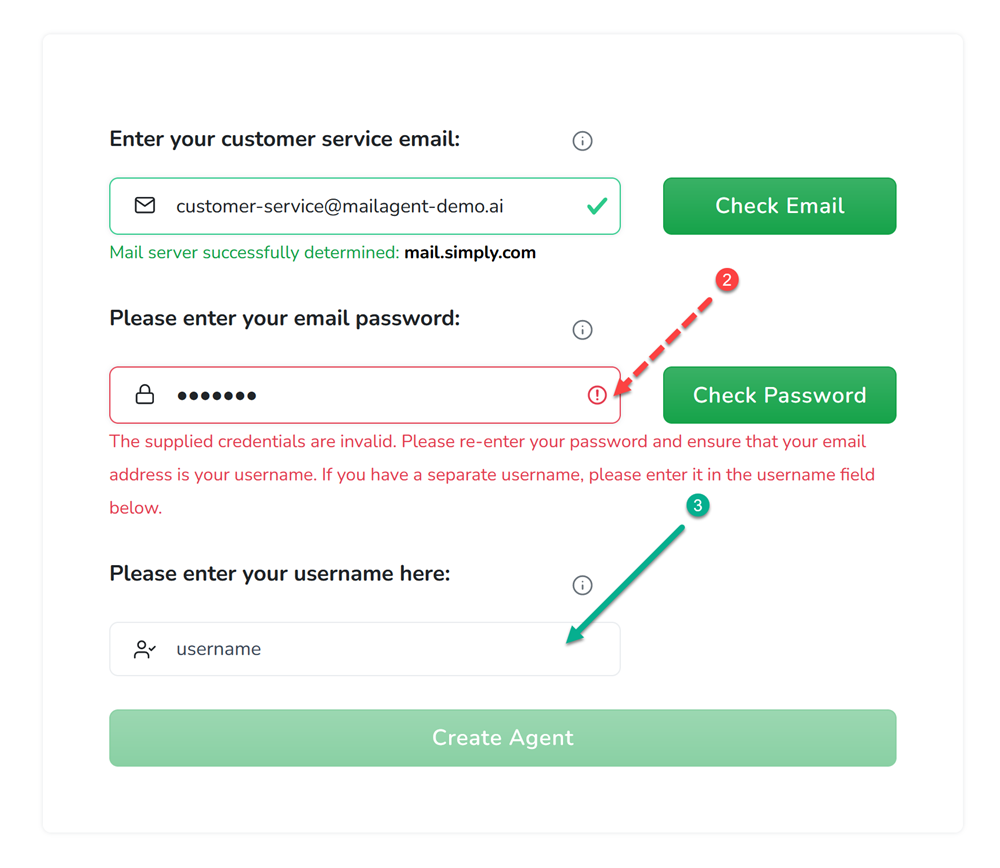
With your email provider confirmed, you're prompted to enter the password associated with your email account. Input your password carefully into the designated field.
Select 'Check Password' to verify the password. If the credentials are correct, you will see a confirmation message, and you can move to the next step.

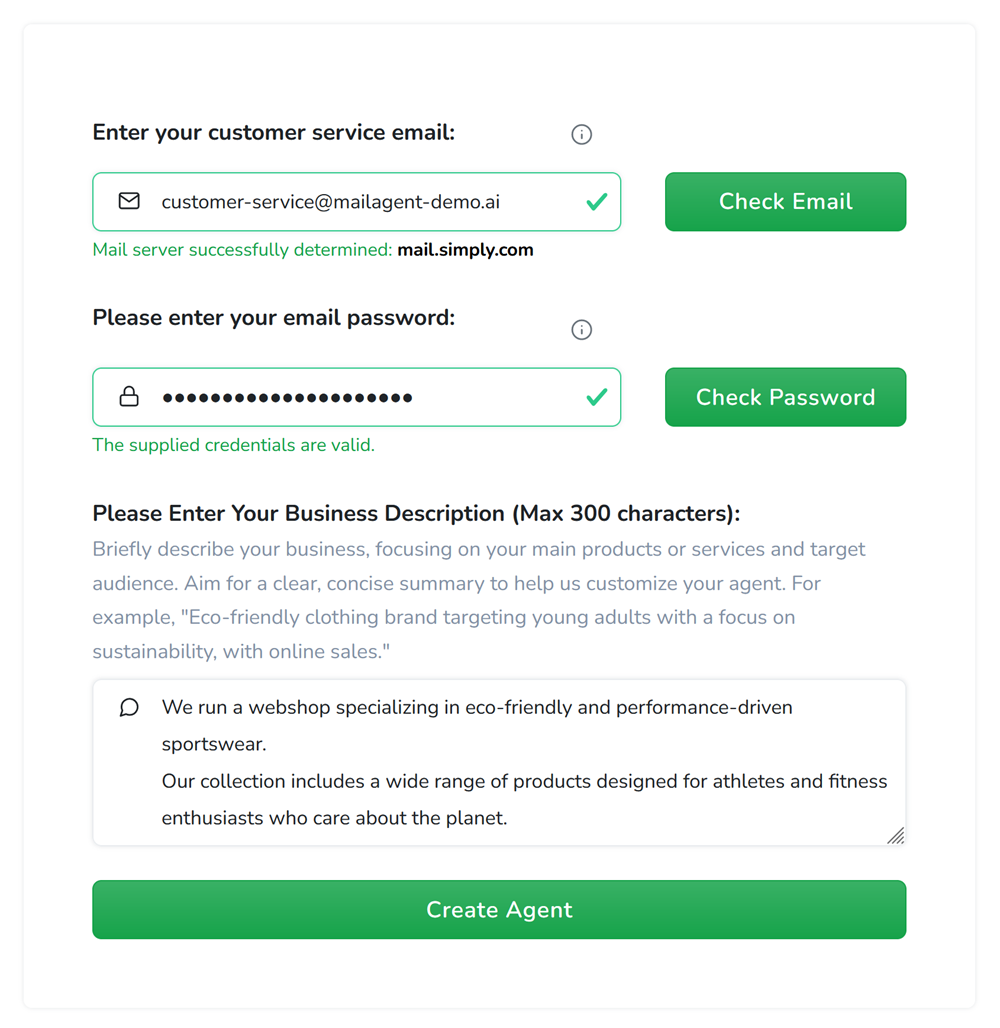
After correcting your credentials, click 'Check Password' again. A green checkmark will indicate the credentials are now valid.
Craft a brief description of your business in the space provided. This description helps MailAgent.ai tailor the AI's responses to align with your business's unique characteristics and communication style.
Aim for a clear and informative business description, keeping in mind the 300-character limit to ensure brevity. For example, "We are an online clothing webshop featuring trendy and affordable fashion for everyday wear."

Once you've entered your business description, and click on "Create Agent" you're at the final stretch of the integration process. This information enables your MailAgent.ai assistant to be calibrated specifically for your business, ensuring that the email drafts it creates resonate with your brand and customer service approach.
After you've completed these steps, your personalized agent is successfully created. It immediately begins the onboarding process by logging into your mail account to understand and learn from your previous email interactions. This learning phase is crucial as it allows your agent to capture the essence of your communication style and preferences.
After completing the initial setup, a popup will provide you with essential information on getting started. You'll have the option to proceed to the Dashboard by clicking the button provided. Here, you can manage your preferences, view the progress of your agent's learning, and start experiencing the benefits of AI-powered customer service email management that's tailored specifically to your business's needs.
Take advantage of our free monthly plan, which includes 200 drafts and 1000 screenings. Discover how AI can transform your email management effortlessly!